gardening · health and wellbeing

Space

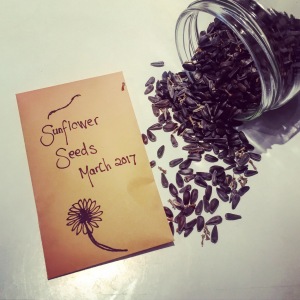
It seems each time you glance at the calendar another week has passed by. Someone is saying, ‘is it that time already?’ or ‘was that really three years ago, it feels like yesterday!’ Our perception of time has evolved this way because our days are so oversubscribed. We constantly move from task to task with minds locked into what is ahead, what needs to be dealt with next. As we continue to operate this way, there is very little space to process what is. A sachet of seeds will remedy this.

Whatever the season, it is time to plant something. Your task is simply to determine what that happens to be in your location right now. Gather some seed raising mix, a container with drainage and your seed package. Once your container is filled with the mix, water it well and allow it to fully drain. Plant your seeds individually, following the spacing and depth specifications on your pack. Cover your container with a clear lid or clingwrap and place it near a sunny window. For a more detailed explanation this Youtube clip will take you through the process.

While you are setting your seeds up this way, life space is created and all you are really considering is how the seeds are. From then on each day you will visit them and look and think about them. As they emerge you will marvel at this and look and think about this. When the adult leaves develop from the two baby leaves you will plan their next potting, while you are looking and thinking. When you introduce your young seedlings to the outdoors you will be a mother duck, watching and thinking. Each day they live in the garden soil you will watch the weather and plan for its impact on your plantings. And finally, one morning when you visit your crop a flower will be there.

And that is when you will really know why you planted your package of seeds.

img_8471

PS After the joy of the blooms has wilted and dried, you can then gather the seed and create the space once again.

health and wellbeing · recipes

Ajna

As any yogi worth their salt will tell you, the ajna chakra is one of great significance. Otherwise termed the third eye, this chakra, situated between our eyebrows, can be described as connecting us to our intuition, allowing us to access our inner guidance and drawing from the sub-conscience. Without realising it, most of us are exercising our third eye regularly and often refer to it in language such as ‘a gut feeling’ or ‘trusting my judgement’ or ‘I instinctively knew.’ It is very comforting to know that we have this resource, and to that to tap into it is simply a case of settling and listening.

I’m not sure that my aunt, now passed, ever took a yoga class in her time, but a piece of advice she once gave me that has always served me well certainly falls in line with this way of thinking. She said, when you come to a crossroad in life and you are faced with a difficult decision that you feel unable to make, don’t make one. In time, she said, the choice or action to take will become clear.  When I have remembered to follow her words, options and choices have definitely crystallised with time and I think this is because my sub-conscious instinctive mind has been given a chance to function.

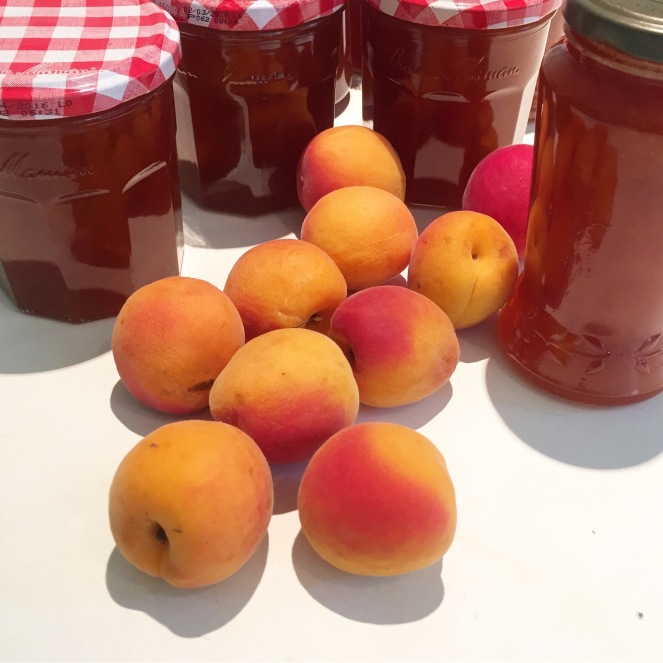
This week I was given a lovely windfall of apricots and as soon as I tasted one I knew that a large pan of bubbling jam would be on the next day’s agenda. Produce straight from the source exudes the most pungent aroma and delicious flavour that no commercially grown item can match and to be able to preserve this in either a jam or bottle is really worthwhile – particularly for the middle months of the year when stone fruits like these are a mere memory.

As I was stirring the pan full of rich amber preserve, I was considering how best to write the instructions for you to make your batch. So many books and articles have been written on the subject of jam making which can be daunting for anyone attempting their first batch. As I mentally checked off terms like ‘setting point’ ‘pectin’ ‘sugar liquid to fruit ratio’, I realised how complicated the explanation to produce a pot of apricot jam was going to become. Having also in the past followed these complex instructions meticulously, only to be left with a runny fruit syrup for my efforts, I knew it needed simplification – and the ajna chakra. So my friends, if you have some beautiful apricots that you want to be spreading on your sourdough in July, this is the way to do it:

Take a deep inhale and a long exhale and know that you can make jam.

Put a china saucer or plate in the freezer. Weigh your apricots after you have halved them, removed their stones and chopped them. Put them into your largest pot and add the same weight in sugar, 3/4 cup of water and the juice of two lemons. My batch was 11/2 kg apricots and 11/2 kg sugar. Over a low heat, stir your potion until all of the sugar has dissolved. Now increase the heat and bring your jam to a rolling boil. Stir from time to time, so that the apricots don’t stick to the base and burn.

Now for your ajna. Look at your pot and if it has been boiling for a while (15 minutes) and is darker in colour, it might be time to test to see if the jam has set. Get your saucer from the freezer and drop a teaspoon of hot jam onto it, waiting until it cools a little. If your little puddle of jam wrinkles a little when you push it with your finger, you’re done. It’s time to take the pot off the burner, let it settle for a minute and then pour your jam into hot steralised jars (100 degrees in the oven). If it has not wrinkled, it will need to boil for a little longer.

These instructions may sound imprecise, but that is the nature of jam making. You will know when your jam has set because you will look at it, taste it, think about and trust your judgement. Step away from fear, panic and doubt, afterall this is simply a pot of fruit mixed with sugar and you are a fabulous person.


img_0142

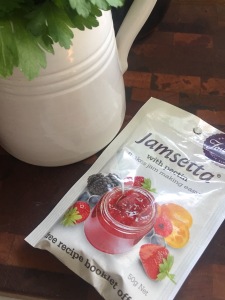
PS if you are not yet comfortable with your ajna and the puddle refuses to wrinkle, a packet of this stirred into the mix will restore your jam and your confidence.

family · health and wellbeing · recipes

Quake

Presently based in Mexico City, my daughter endured the terrifying experience of an earthquake. Standing in a queue on nightclub stairwell (where most twenty-somethings living on the other side of the world from home should be) the quake hit. Fearing its likely collapse, she had the presence of mind to push herself and those ahead of her off the stairs and into the club – where they safely waited it out.

Although she was physically unscathed, the experience has remained within her protective recesses. The nights are very hot in Mexico and for maximum sleeping comfort the minimum in sleeping attire is required. Never sure now when the next tremor may strike, she keeps a pair of pants within arm’s reach next to her bed should she need to evacuate to the street in the wee hours. Affectionately termed her ”earthquake pants” they provide the security she currently needs to sleep well through unsettling circumstances.

And today I thought, we all need earthquake pants, something or someone we know we can reach for when life trembles. I am lucky. I have some very sound quake strides that have supported me, so I urge you to think about what are yours. For many the fabric is woven from religion, a parent, a partner or a social network. Whatever guise your pants may be, cherish them and keep them close.

I hope I am the earthquake pants for my children.

Maybe you also have a pair fashioned from the strongest material available, but have not yet discovered them or have forgotten they are there, folded securely within you. These are the pants that you slide into when the fault lines of life shift and separate beneath you. Their warp and weft threads are tightly bound by the inner strength of your human spirit – and nothing, not even a shift in the physical earth will ever separate them.

If you are experiencing or have endured your own personal instability, this is a lovely piece to help restore calm.


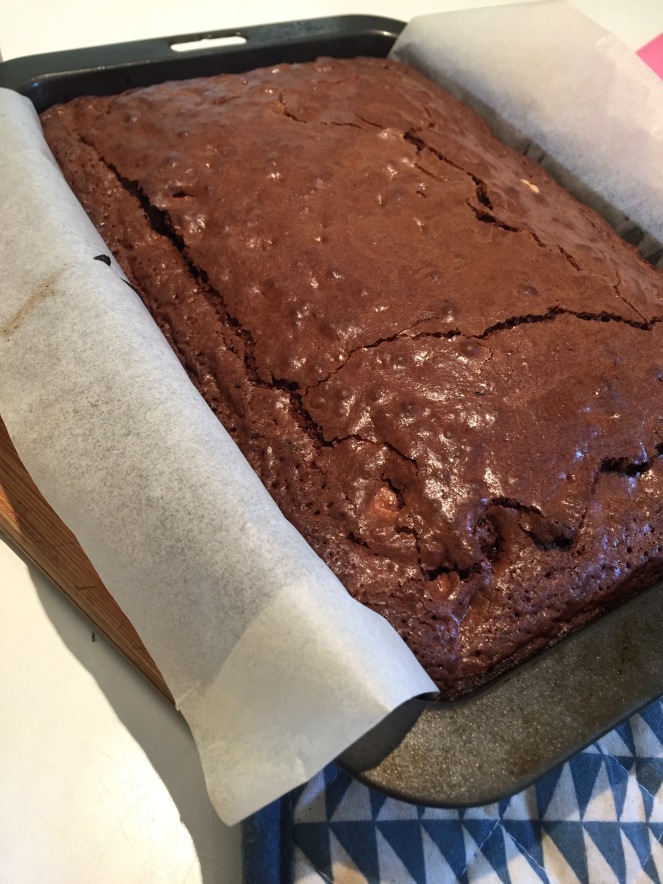
And here is the recipe for this brownie, with all of its cracks, splits and crevices.

Cranberry and Mixed Nut Brownie

125g dark chocolate
175g butter
3 eggs
275g caster sugar
75g plain flour
1 teaspoon baking powder
1/4 tsp salt
small handful of dried cranberries
150g mixed unsalted nuts, chopped

  1. Pre-heat the oven to 170 degrees (fan-forced).
  2. Grease and line a slice tin with baking paper overhanging the sides.
  3. Place chocolate and butter in a heat proof bowl and melt over a saucepan of simmering water. Stir constantly and cool for a few minutes once melted.
  4. Beat eggs and sugar.
  5. Blend this mixture with the chocolate mixture and fold through all of the dry ingredients.
  6. Pour into lined tin and bake for around 30 minutes.
  7. Once completely cold, slice into portions, which if you have no will power to withstand, like me, share out or place in the freezer for a rough day.


recipes

Rekindle

The slow cooker and I have a seasonal relationship. In early Autumn we greet one another like long lost friends and set about sharing some very productive times together. As winter descends our partnership strengthens as we work together ever more closely, exchanging smug glances and proudly patting one another on the back as each lovely braise, curry or soup develops. However, by September 1, we are so bored in each other’s company we cannot bear the sight of one another. If either of us has to deal with another diced onion or budget cut of meat we’ll shriek. We retreat to separate areas of the home, the cooker in the hall cupboard, me to the barbeque. Occasionally over the summer when the cupboard door opens, we catch sight of one another and glare, as not enough distance or time has elapsed to make our hearts grow fonder. Now as the leaves begin to colour and an extra layer overnight is required, we seek each other out with renewed interest to begin another industrious season in the kitchen together.

The secret to keeping things fresh with the slow cooker is to change it up a bit each year. Repeating old favourites is fine to point, but as cooks we evolve and as diners our palates change. There are certain staples the cooker is renowned for: lamb shanks, beef casserole, chicken curry and the like but if you want to keep this appliance relevant, it needs to move with your current dietary preferences. Today I have had a pork shoulder rubbed in paprika and coated with a mix of tomato, brown sugar, hot chilli sauce, apple cider vinegar and chilli flakes languishing in the cooker for 8 hours on low. A slaw of cucumber (current garden glut), carrot shred and coriander, dressed with apple cider vinegar, lime juice, honey and toasted sesame seeds, will sit nicely with this pulled pork inside some warmed wraps. I cannot think of a nicer Saturday evening dinner right now – and there will be plenty left for tomorrow.

My forward plan for the cooker this season includes gently cooked fish parcels and steamed dessert puddings. This is a way of using the cooker’s traditional technique, but for shorter periods, as these dishes will only take 2-3 hours at most. Using the cooker this way, frees up the oven for other food, or simply allows you to cook without constant supervision. I have never really considered using my cooker as a dessert oven and thoughts of a fruit pudding simmering away quietly in the background while the main meal is underway is quite appealing.

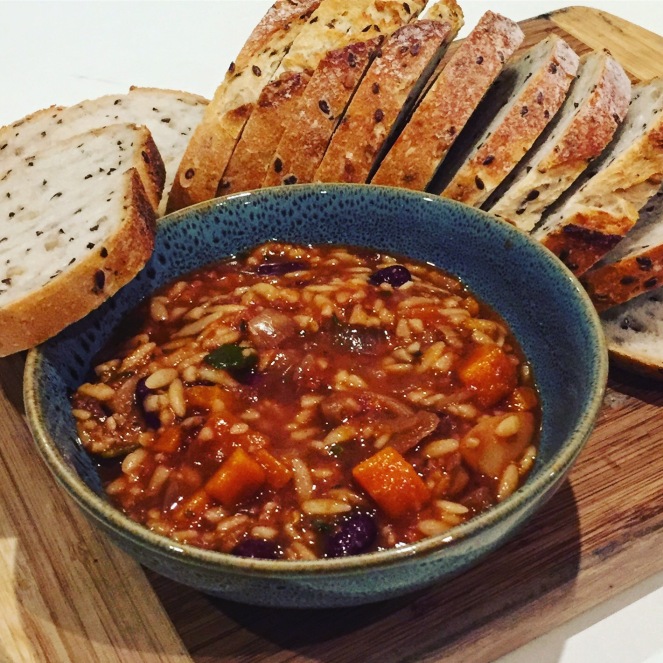
Of course, like so many households, ours is one of an ever-changing combination of occupants, who dine at various times around the clock. Having a pot of soup on hand and a lovely loaf will always cater for these out of hours diners. The slow cooker is perfect for this, and so I intend to broaden my soup repertoire this year. So to kick this off, spurred on by all of the current ‘research’ around the benefits of the Mediterranean diet and wanting to have a hearty soup underway, my oval partner and idea produced a delicious minestrone which we paired with some lovely seedy sourdough. Looks as though the relationship for 2017 is off to a great start.

minestrone

2 carrots, diced
1 onion, diced
1 potato, diced
1 zucchini, diced
3 cloves garlic, crushed
3 rashers bacon, diced
½ cup tomato paste
1 punnet cherry tomatoes or fresh chopped tomatoes
2 cups water
2 teaspoons chicken stock powder
410g can red kidney beans, drained
1 teaspoon dried oregano
Salt and cracked black pepper
2 cups of cooked risoni or other small soup pasta

Put all ingredients in the slow cooker, except the pasta, and mix well. Season well with salt and cracked black pepper. Cook for 4 hours on high or 7 hours on low. 30 minutes before the soup is cooked, add the warmed cooked pasta and stir through, cooking for a further 30 minutes. Serve the soup with shaved parmesan and crusty bread – whenever

serves 6

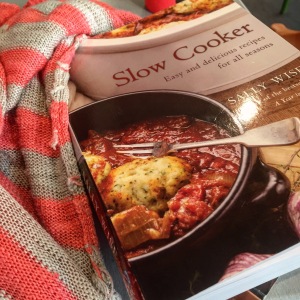
This recipe is an adaptation of one from Sally Wise, who has written some fabulous slow cooker gems. This particular soup is from Slow Cooker – Easy and Delicious Recipes for all Seasons.

img_8639

homemaking · recipes

Jars


The calendar flipped over today, and in doing so, I caught a glimpse of Easter on the horizon. The cooler nights and even chillier mornings have also been hinting of its arrival, so I now have the official go ahead to arrange a festive display in the hallway with some treats on offer. This year we have a small wooden tree with pastel coloured eggs dangling from its branches, a bunny bowl filled with chocolate eggs and a favourite jug filled with lemon balm and pink blooms. Of course the next thing thoughts turn to is Easter baking, as there is something quite complementary about cooler weather and warm ovens.

A quick glance in our refrigerator at any time of the year will reveal several opened jars of jam each with various quantities depending on popularity. One of the best ways I know to consolidate this situation is to bake Jam Drops. These are buttery little biscuits with a well made in the centre of the dough to be filled with jam before they are baked. This week the wells were filled with raspberry and plum jam, but at other times apricot and fig jam have been equally delicious. These baking sessions are very rewarding because not only do I end up with a generous batch of biscuits for the week but also some lovely new jars to fill with spices and other dry pantry items.

Clean glass jars look appealing filled with dry goods. I prefer them to plastic containers as their individual sizes mean I always have the right storage capacity available. Using larger jars allows you to buy your food staples in bulk, which is economical and reduces continuous throw away small packaging. Jars are easy to clean, seal well and the contents are clearly visible. I have almost replaced all of my tiny spice jars with larger versions which are so much easier to dispense from. Labeling is important though, as a teaspoon of mixed spice rather than a teaspoon of cumin, makes quite a difference in a recipe!

So if you have butter, sugar, flour and an egg in your kitchen and a refrigerator that needs some space freed up then you have the makings of a wonderful batch of biscuits to kick off your Easter season.

jam drops

125g butter, softened
½  cup sugar
1 egg
1 ½ cups SR flour, sifted
Jam

  1. Preheat the oven to 160 degrees celcius
  2. Line baking trays with baking paper
  3. Cream the butter and sugar until pale and fluffy
  4. Beat the egg in to the mix thoroughly
  5. Fold the flour through the mix with a metal spoon – it will be quite stiff and will form into dough by the time the flour is mixed through
  6. Roll teaspoonfuls of the mixture into balls and place on the baking tray, leaving room for the biscuits to spread
  7. Using your thumb, press a well into the centre of each biscuit fall and fill with a small amount of jam. Don’t over fill or the jam will overflow onto the baking sheet.
  8. Bake for 10-15 minute or until nicely browned.

Makes 24 approximately

img_8570

recipes

Bronze

bronze wing

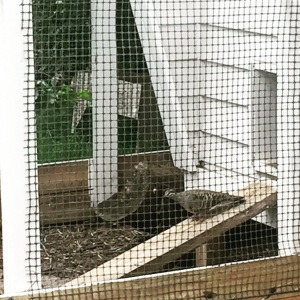
A lovely adjunct to keeping a small peep of chickens is the thriving community of bronzewing pigeons that have joined us.

At first light, they perch expectantly on the fence rail of the chicken enclosure, waiting for the caretaker (me) to raise the hatch of the coop. After five coppery hens surge from within and down the timber plank that serves as the gangway to the new day and fresh pasture, the pigeons surreptitiously make their way inside the coop by reverse process. One or two will remain behind to keep lookout on the rail and raise a signal should one of us come too close, whilst others venture in and feast on the lovely blend of poultry grain kept dry and well supplied in the stainless steel feeder. For reasons known only to those belonging to the avian family, the chickens seem oblivious to their presence in and amongst their enclosure, but should a venturing magpie, kookaburra or heaven forbid, noisy minnah come in to land, these intruders are sent packing in no uncertain terms.

img_8522
Word must have gone around as the bronzewing numbers are steadily increasing and some afternoons when I approach a little unexpectedly, the sound of beating wings with rapid take off can be likened to that of Trafalgar Square. I notice also, that the collective girth is expanding and I’m sure that can be attributed to the nutritious feed and the rapid rate at which it is depleted, a rate far quicker than you would anticipate five Isa Browns to consume at. I don’t mind the extra outlay for these birds, the gentle native creatures that they are. Perched amongst branches, casually browsing on the grass or nestled in leaf litter, they imbue a mood of peace and tranquillity throughout the garden. However, on one particularly balmy afternoon when I went out to collect eggs, I opened the door of the chicken house and surprised a snoozing bronzewing. The surprise was mutual and after a mad flapping (bronzewing) and a couple of expletives (me) we both vacated with racing hearts. Sometimes though, I hear them whooo whoooing far up in the eucalypts which is quite reassuring – it is as if we have vigilant sentries keeping watch.

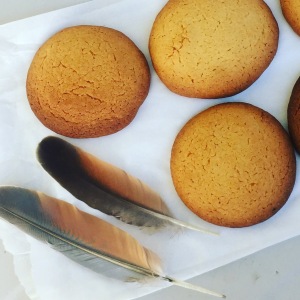
As their name implies, they sport sheeny iridescent autumnal hued feathers in their wings, which when fanned out in the sunlight, are a magnificent sight. This metallic flash is often seen on take-off, or when the resting bird is angled toward the sun, and as our days move into these lovely golden afternoons, the pigeons seem to tone in so beautifully with their surrounds. There is nothing nicer on these days than taking a mug of tea outside to watch them potter about.

img_8525
With all this seasonal burnished, bronze influence my thoughts turned to a very simple biscuit recipe, that speaks of these tones in its delicious caramelised flavour. Burnt Butter Biscuits. So simple is this recipe that the ingredient list is waiting in your kitchen. The richness of flavour comes from gently caramelising the butter before it is added to the mix. A batch of these are a lovely way to celebrate this gentle season and hopefully you have some birdlife to quietly observe whilst enjoying them.

burnt butter biscuits

125g butter
110g caster sugar
1 egg
1 tsp vanilla extract
110g SR flour
75g plain flour
pinch of salt

  1. Preheat the oven to 180°C (or 170°C fan-forced)
  2. Line your trays with baking paper
  3. Melt the butter over a low heat and then cook gently until it turns golden
  4. Cool and pour into a mixing bowl
  5. Add the sugar and beat well then stir in the egg and vanilla
  6. Sift the flours and salt then fold these into the mix
  7. Roll mixture into balls and place these on the trays, allowing room for spreading

Makes 22

img_8535

Credit must be given to Australian Critters for the opening image on this post.

recipes

Feast or Famine


With one away on school camp, another at university and the third spreading his wings into life outside the confines of the school timetable, dinner time catering has been flipped on its head. From loaves and fishes it has become ‘how do I cram all of these leftovers back into the refrigerator that no one was home to consume but out of habit I cooked anyway?’ As such, I was peering into the chilled shelves when met with the questioning stare of some lovely marinated baked chicken wondering what its next culinary incarnation would be. Thankfully, I have tucked away, a simple and quite delicious chicken curry recipe that requires leftover cooked chicken.

This recipe has also dealt with excess charcoal chicken purchases and the unthreading of chicken kebabs that the barbeque crowd simply could not finish. Not only surplus chicken, this recipe requires fresh tomatoes – which we have in abundance right now and any opportunity I have to use them outside of pasta sauce or salad becomes a hallelujah moment. Last winter I became a serious curry cook so my spice library is fully stocked. The remaining ingredients are basically pantry mainstays so I did not need to set foot outside of the kitchen to put this one together.

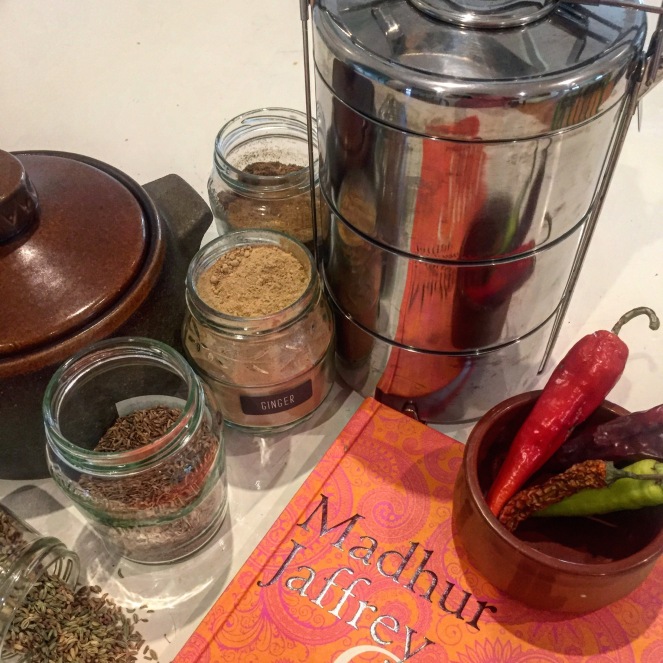
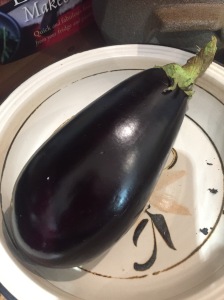
Nearby on the sideboard, two plump eggplant made themselves apparent. They were trophies brought in from the garden earlier in the week and having served their admiration purpose sufficiently were ready for the pot. Madhur Jaffrey, my Indian food go to has a simple recipe, Aubergine with Nigella seeds, which my daughter has affectionately shortened to ‘black seed’. This vegetable dish is the perfect accompaniment to any curry, so that’s where those eggplants were going to perform their swan song. With these two dishes underway, all that remained was to boil a pot of rice, spoon out a fresh bowl of yoghurt and pan fry some frozen flat bread for sauce dabbing. By the time you lay all of these dishes out on the table, it appears as if a magnificent feast has been prepared. At this point, I can never resist slipping out to the garden just beyond the kitchen door and plucking a sprig of lemon balm or mint to garnish the yoghurt bowl.

It doesn’t really matter who appears at the table, as this meal seems to go around generously and anything left is further enhanced in flavour the following day as the spices are given extra time to develop. A recent purchase of a tiffin carrier means I can individually pack any leftovers and deliver them to a very appreciative grandmother who can also have her own mini feast. I have coveted these little stainless steel carriers for years, my first introduction to them being at a cricket match when Australia was playing against India. I sat behind an Indian family and at lunch break was fascinated as they unclipped each individual pot from the stack and doled out rice, curry and like to all of the family present. Our local supermarket had a shipment of these shiny wonders recently, so of course one was slipped into the trolley with the milk, oats and washing powder.

flexible chicken curry
2 tbsp olive oil
1 onion finely chopped
½ tsp salt
3 cloves garlic finely chopped
1 tbsp ginger finely chopped
2 tsp ground coriander
1 tsp cumin
1 tsp garam masala
½ tsp ground cardamom
½ tsp cinnamon
½ tsp turmeric
½ tsp chilli powder
2-3 tomatoes roughly chopped
300ml chicken stock
cooked chicken chopped into bite sized pieces
2 tbsp yoghurt

Heat the oil in a heavy based pot and fry the onion gently with the salt until softened. Add the garlic and ginger and fry for a further 2 minutes. Add the spices and cook stirring continuously for 3 minutes. Add the tomatoes and stir through for 1 minute. Add the chicken stock. Bring to the boil and then reduce heat to a simmer for 15 minutes. Add the cooked chicken and stir through the yoghurt. Simmer for another 5 minutes or until the chicken is well heated through.

img_8387

gardening

Repurpose

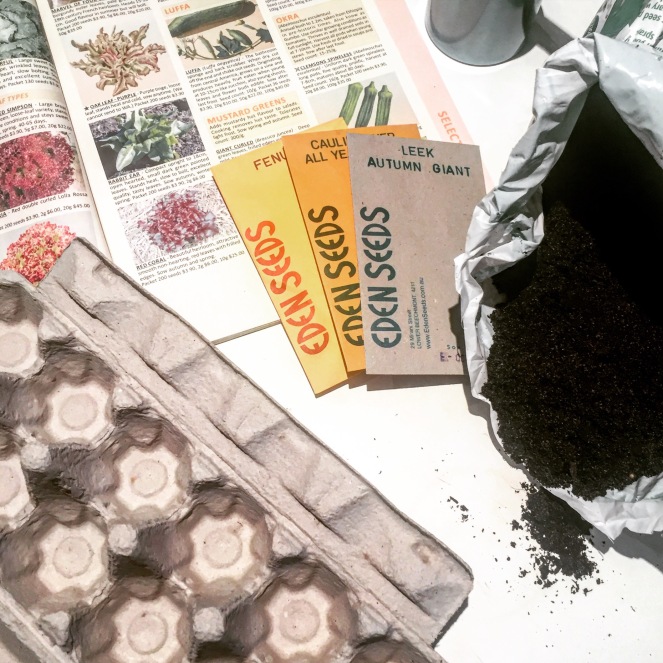
When perusing a seed catalogue with a view to vegetable planting for the coming season, it’s easy to have eyes bigger than available plot space. I have experienced this in the past and with novice gardener’s enthusiasm have attempted to grow too many varieties resulting in what can only be described as a crowded, unsuccessful tangle. This season I am narrowing my selection to three plantings based on what will grow best and what we will actually eat. It’s all very well sowing several rows of hollow-crown parsnip seeds, but what do you do when upon harvesting your glut, everyone at the table pokes at the mash suspiciously or makes polite excuses? So this winter, I plan to slice the heads off cauliflower and broccoli and uproot a good supply of leeks because these are the staples that appear in many of our cold weather meals. There will also be some fenugreek seeds going in, a herb to be added to winter Indian curries, and based on the fact they will prosper independently in terracotta pots, they won’t be part of the head count.

When you keep chickens, it’s amazing how generous people are with their empty egg cartons. I have accumulated a tremendous supply from well-wishers who I suspect, like me, are not comfortable tossing away these resourceful cardboard packages and share a collective relief that there is a good home to be found for them. There is however, a limit to how quickly my brood of five can fill them, so I do have a considerable stockpile. You can then imagine how pleased I was when I saw these gems planted up as seed sprouters, that when the seedlings have reached maturity, can be planted out directly in the garden within their own biodegradable pods. Less shock to the seedlings and nothing to be disposed of – a perfect gardening scenario.

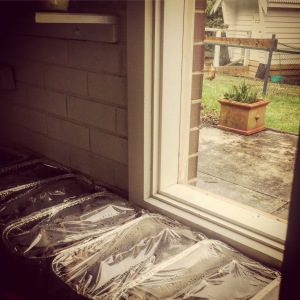
When sliced down the centre, the bobbly half of the carton with the 12 egg craters is filled with seed-raising soil (after being pierced with a skewer for drainage). Simply insert the exact number of seeds in each pod and gently water with a spray bottle. Each of my seed planters sits in its own aluminium baking tray and is covered with cling film to create a mini hot house. The cardboard lip that was formerly used to close the carton is a fabulous place to write the name and planting date of the seeds.

The plan is, once the sprouts have appeared, all but the strongest in each pod will be culled – survival of the fittest, natural selection, runts of the litter – whatever biological theory you subscribe to, will be the way the most superior, robust seedlings with the greatest chance to produce will go forth to the great outdoors and provide us with a groaning table of winter veg. Well, that is my theory. For now they sit lined up near a sunny window and I have a new daily task assigned to lift the cling film, give a light spritz of water, watch and wait.

img_8469

homemaking · recipes

New Season


It’s challenging to change gear and move into autumnal activity right now whilst we are experiencing this balmy Indian Summer. With fully blown hot sunny days and balmy evenings, thoughts of pumpkins, tonal leaf shades and pine cones are difficult to muster. The chickens are experiencing this too. By mid-morning they are impatient for release from their parched, browned-off pen, eager to wander the wider garden to peck at their whim, insects and fresh growth sprouting near a leaky tap or within a spray of the irrigation system. I know this because their early morning amiable banter escalates to irritable clucking and crowing. When I finally give way to this vocal pressure and wander out to their enclosure, they bustle to the gateway with incredible urgency and push past me like peak hour commuters on a city train station.

I am pressing on with my autumnal plans regardless, because winter vegetable seeds will not sow themselves and new season’s apples will not be so new in six weeks’ time. As such, the weekend just past, focused significantly on both.

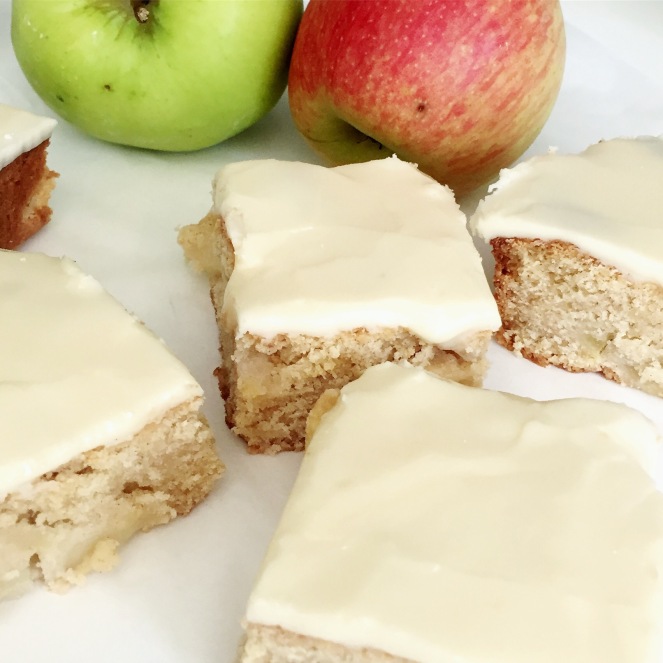
With a plan to sourcing more of our family’s food locally, some recent Googling led me to the discovery of Staples Apples a local grower on the Mornington Peninsula. It will be another month before their shed sales begin, and in anticipation, I have sourced a recipe for an apple slice that I having been wanting to try for some time. As a child, when given the choice in a bakery, I would always seek out an apple slice. Arranged on wire racks behind the glass counter, I would spy these luscious sugary topped squares and no amount of cream or chocolate coating could sway me. Handed across in a brown paper bag with the top corners twisted for added security, the apple slice was indeed a memorable childhood treat.

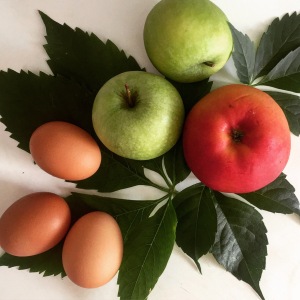
When I’m inspired to create in the kitchen, a month might as well be an eternity, so the apples sourced from our local IGA clearance basket languishing in the second drawer of the crisper were going to have to stand in. Once the apples were diced and combined with the remaining ingredients, the nice thick appley dough came together to be pressed into the tray and baked until golden. After drawing it from the oven, I could have sprinkled the top with sugar and left it at that, but my baking vision was more of a dense fruity slice smothered in thick vanilla icing. So summoning patience, I let the golden beauty cool off in it’s baking tin and then whipped up a white glossy topping. Once set, the tray bake was scored, sliced and met with overwhelming approval.

iced apple slice

3 apples peeled, cored and diced
2 cups SR flour
1/2 cup sugar
1/2 tsp cinnamon
125 g melted butter
1 egg

Icing
1 1/2 cups icing sugar
1/2 tsp vanilla extract
boiling water

  1. Pre heat oven to 170 degrees, grease and line a 20 x 30 cm slice tray. Allow the lining paper to extend over the sides to make the baked slice easy to remove.
  2. Combine apples, flour, sugar and cinnamon in a large bowl.
  3. Beat egg into cooled melted butter.
  4. Stir butter mixture into apple mixture.
  5. Press this firm mixture into the base of the lined tray.
  6. Bake for 30 minutes or until nicely browned.
  7. Cool in the tray and then ice.
  8. Make icing by mixing icing sugar, vanilla extract and enough water to make a thick icing.
  9. Spread over slice and when icing has set, turn slice out of tray and cut into squares.

img_8450-1

book reviews · recipes

Sophie

It is with barely contained glee that I can announce, we saw the trailer for Spring 2015 here today!

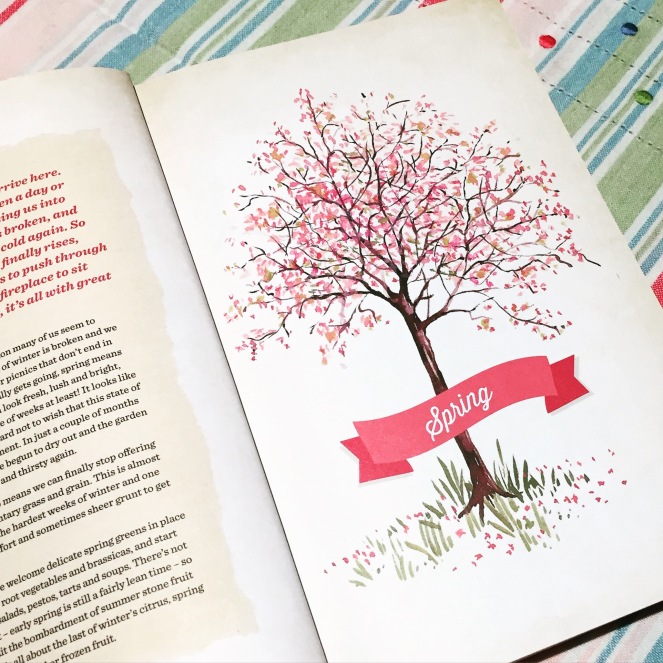
Yes, all of the highlights – bird twittering, daffodil nodding, lawn mowing, cat sprawling and of course sun drenching – were condensed into the happy daylight hours of this late winter Saturday. And if the coming season is anything close to what this trailer alluded to, it’s going to be a cracker! So, inspired by this exciting preview, I thought it fitting that the opening image to this post about Sophie Hansen be the spring illustration from her book, Local is Lovely.

But before I continue, I just need to take a quick side-step up to a soap box, and restate my passionate belief yet again – we all need to continue to cook. We need to take produce from around us, where possible, in it’s simplest form and slice it, mix it, bake it, steam it, roast it, mash it or whatever needs to be done to it to produce nourishing, appealing food to fuel healthy lives. And most vitally, our children need to see this happening. They need to be exposed to basic raw materials being crafted into meals so that when their time comes to take responsibility for their own nutrition and/or the nurture of others, this will be their default. Because it’s what they saw.

They need not have seen elaborate haute cuisine, but simply, basic combinations of fruit, vegetables, proteins and grains with a measure of fats and oils keeping things balanced and delicious. If that means thick slabs of bread loaded with generous slices of tomato, fresh cheese and garden herbs, topped with some pan-crisped salami, then the job is done. And if it can’t happen this way each day because the pace of life takes precedence, then that’s ok – just so long as there are times when it does.

So this now brings me to Sophie, a food writer and one-woman cheersquad for the local farmers/producers in her neighbourhood, within which, her farm in Orange, four hours west of Sydney is located. She is a strong advocate for sourcing food locally not only for the deliciousness of it but also to support the local growers, whom she believes are the heroes of our land. In her beautifully laid out read, you will be taken through the seasons, inspired by earthy delicious cooking using seasonal produce and intrigued by a sprinkling of profiles of her local farmers.
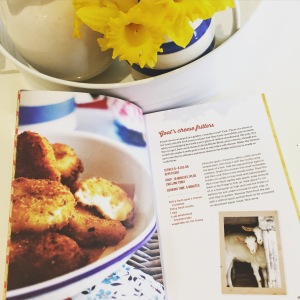
local is love

As well a being just a pleasurable, inspiring read, Sophie’s message within these pages is clear, to source locally, cook seasonally and enjoy the process.

Now I realise that most of us may not be located bang smack in the centre of a regional food bowl, and the local supermarket may be as close as it gets to sourcing our produce, and that’s fine too. It is amazing though, if you attempt to sniff it out, there are sources of locally grown staples, even in inner urban areas that can be drawn upon. I have a free-range egg farm close by and I imagine that many of you have a monthly farmer’s market in your vicinity. Some of us have neighbours with fruit trees whilst others are making it their business to learn the art of foraging and finding wild delights ripe for the taking. My point is, use what is available to you when you can and become aware. It’s not about making sweeping overnight changes, but gradual shifts toward a healthier and therefore more enriched lifetime.

So while you ponder this, here is a Chocolate Blackberry Loaf, one of Sophie’s Winter Baking recipes (that you can receive in a free ebook that can be downloaded when you visit her and sign up for her newsletter) to enjoy.

1 cup plain flour
5 tbsp cocoa powder
1 tsp baking powder
1/2 tsp bicarb soda
good pinch salt
1/4 cup espresso coffee (I used one shot from our little machine at home but you could also make a really strong plunger coffee and use 1/4 cup of that)
1/2 cup natural yogurt
1 tsp vanilla paste
150g unsalted butter, softened
1 cup caster sugar
3 eggs
1 cup blackberries (raspberries or blueberries would also be good)

Preheat oven to 180C and grease and line a large loaf tin. Sift together the flour, cocoa powder, baking powder, bicarb and a good pinch of salt and set aside. In another bowl, combine the coffee, yogurt and vanilla and stir well. Now cream the butter and sugar together in an electric mixer, until pale and fluffy.
Add the eggs, one at a time, beating well between each addition. Add the yogurt mixture and mix in on low speed. Then, by hand, fold in the flour mixture and finally fold through the blackberries.
Spoon batter into the tin and bake for 45 minutes or until the cake is just pulling away from the tin’s sides and it feels firm to touch
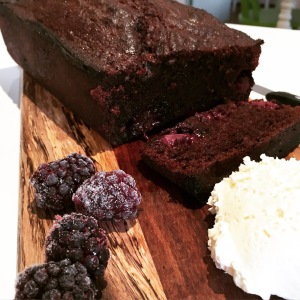
Chocolate Blackberry Loaf

Postscript: and apart from the ethical, nutritional, sustainable and economic values Local is Lovely expounds, anyone who creates a cake recipe combining chocolate, coffee, blackberries and greek yogurt ought to be worth paying attention to.